
How to Use the Heat Mapping Tool
In Maptive, you can use the Heat Map Tool to visualize and identity trends in your location data. To use the tool, just follow these steps:
Step 1: Open Map Tools.

Step 2: Open the Heat Map Tool.

Step 3: Select your heat map style. You can create heat maps that represent either (1) marker density or (2) numerical data.
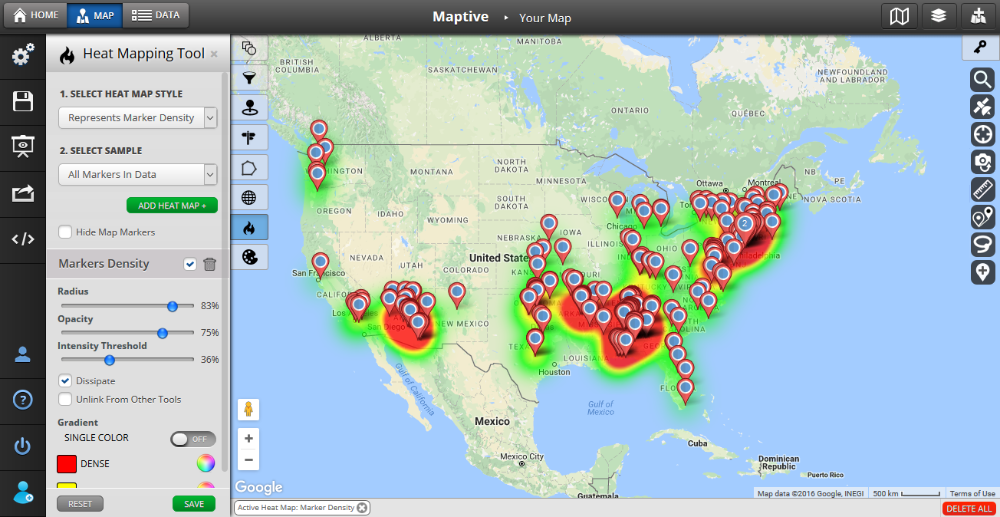
Step 4: Click the ADD HEAT MAP+ button to create your heat map.

The example above is showing a heat map representing marker density based on all markers in data.
Optional Step 5: After your heat map has been created, you have the option of making a few adjustments as desired. You can adjust radius, opacity, intentional threshold, and the gradient colors displayed in your heat map. You can also choose to display just one single color.
Note: By default, your map markers will be hidden when you create and view your heat map for the first time. To display your markers, just uncheck the Hide Map Markers option, as shown below:

 You can also create a heat map that represents marker density for a specific group.
Creating a heat map that represents numerical data is simple too, All you need to do is follow these steps:
Step 1: When selecting heat map style, choose the Represents Numerical Data option.
Step 2: Select the correct column in the Numerical Data drop down list. The list will display all of your columns:


Step 3: Click the ADD HEAT MAP+ button to create your heat map.
Optional Step 4: After your heat map has been created, you have the option of making a few adjustments as desired. You can adjust radius, opacity, intentional threshold, and the gradient colors displayed in your heat map. You can also choose to display just one single color.
Available Option: For both heat mapping options we've added the option to 'Unlink From Other Tools'. This will allow you to filter the markers further without effecting the heat map.